
Wireless Call Bell

This project is about a wireless musical call bell, which I designed to meet some of my friend's requirements. This circuit design uses only the 4000 series CMOS logical ICs, NE555, UM66, and TDA7233 audio amplifier IC. For the remote control, we use a 433MHz 4-channel remote control module. This circuit is designed to work continuously with a low-power external 5V power supply.

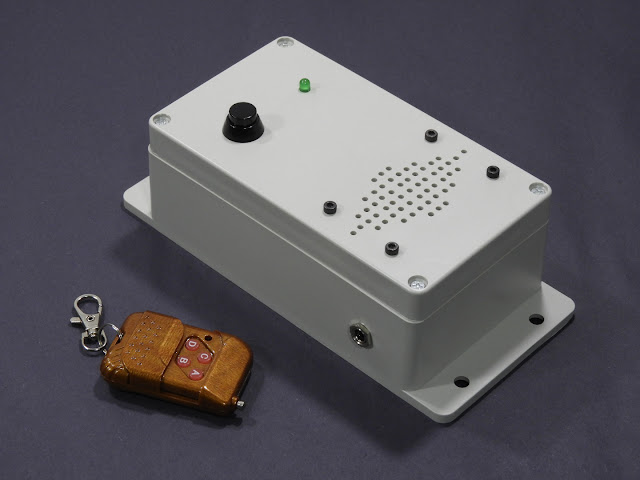
Prototype version of wireless call bell.

The PCB in this call bell is designed as a single-sided PCB. The dimension of the PCB is 82mm × 50mm. 

All the components in this circuit are commonly available through-hole-type components. The whole assembly process of this musical call bell is shown in the video attached to this document.

The RF remote control module we use in this project consists of a remote control decoder and encoding IC. In our version, the transmitter (key fob) has a PT2262 encoder, and the receiver has a PT2272 decoder IC. In the prototype build, the receiver and transmitter are configured to use the default address code. To utilize different address codes, tie appropriate address pin(s) to the VCC or GND on both transmitter and receiver. 

To improve the working distance of the receiver, we attach a small helical antenna to the receiving module. This antenna is constructed using a 22 S.W.G telephone wire, and its dimensions are illustrated below:

Antenna for the 433MHz receiver module.

With the antenna above, we successfully trigger the bell at a distance of 20 m through a few brick walls.

For the housing, we use a 196mm × 90mm × 60mm ABS project box. The drilling layout for the enclosure is illustrated below:

Front panel layout.

All the schematic, BOM, and PCB design files of this musical call bell are available from here.


Comments

Popular posts from this blog

CD2003 - yet another simple FM radio receiver

In the last few days, we are looking for some simple FM radio receiver to integrate into one of our ongoing projects. For that, we try several FM radio receiver ICs including TDA7000, CD2003/TA2003/TA8164, CXA1019, and KA22429. Out of all those chips we select CD2003 (or TA2003/TA8164) based receiver for our project because of its simplicity and outstanding performance. Except to CD2003, Sony CXA1019 also perform well but we drop it because of its higher component count. We design our receiver based on Toshiba TA2003 datasheet and later we try TA8164 and CD2003 with the same circuit. Either CD2003 or TA8164 can directly replace TA2003 IC, and as per our observations, TA8164 gives excellent results out of those 3 chips. A prototype version of CD2003 FM radio receiver The PCB design and schematic which we used in our prototype project are available to download at google drive (including pin-outs of crystal filters and inductors ). Except for CD2003 IC, this receiver consist

Arduino superheterodyne receiver

In this project, we extend the shortwave superheterodyne receiver we developed a few years ago . Like the previous design, this receiver operates on the traditional superheterodyne principle.  In this upgrade, we enhanced the local oscillator with Si5351 clock generator module and Arduino control circuit. Compared to the old design, this new receiver uses an improved version of an intermediate frequency amplifier with 3 I.F transformers. In this new design, we divide this receiver into several blocks, which include, mixer with a detector, a local oscillator, and an I.F amplifier. The I.F amplifier builds into one PCB. The filter stage, mixer, and detector stages place in another PCB. Prototype version of 455kHz I.F amplifier. In this prototype build, the Si5351 clock generator drives using an Arduino Uno board. With the given sketch, the user can tune and switch the shortwave meter bands using a rotary encoder. The supplied sketch support clock generation from 5205kHz (tuner frequ

Calculator for audio output transformers

Audio output transformers are heavily used in a vacuum tube and some (older) transistor base audio power amplifiers, but these days output transformer are quite hard to find and expensive item. For homebrew projects, the best option is to construct those transformers by ourselves and this script helps to calculate winding parameters for those transformers. This " AF output transformer calculator " script is written using Python and it works with most of the commonly available Python interpreters . The script is available to download at google drive under the terms of GNU General Public License version 3.0 . Homebrewed 25k: 4 output transformer Once supplied the input parameters this script provides a winding ratio, the number of turns required for primary and secondary winding and required copper wire gauges for both primary and secondary windings, etc. We construct several AF output transformers based on results of this script, which including transformers for M